As @rsmith mentioned, we should use the T1 for registration and not any of the 5tt outputs. I’m going through @martahedl’s excellent tutorial myself, and altered that portion of the pipeline as follows to get a good registration (using a T1_BET and a mean_bzero_BET).
#Create T1_raw.mif
mrconvert ../T1/ T1_raw.mif

#Run 5ttgen with -nocleanup option (so you have the T1_BET.nii.gz for registration)
5ttgen fsl T1_raw.mif 5tt_nocoreg.mif -nocleanup

#Create mean bzero image and BET it
#Visually check BET accuracy and tweak BET command if needed.
dwiextract dwi_den_unr_preproc_unbiased.mif - -bzero | mrmath - mean mean_b0_preprocessed.mif -axis 3
mrconvert mean_b0_preprocessed.mif mean_b0_preprocessed.nii.gz
bet mean_b0_preprocessed.nii.gz mean_b0_preprocessed_BET.nii.gz -c 47 49 30 -f 0.4

#Register mean_b0_preprocessed_BET with T1_BET (found inside 5ttgen temp folder)
#Visually check accuracy and tweak flirt command if needed.
flirt -in mean_b0_preprocessed_BET.nii.gz -ref 5ttgen-tmp-*/T1_BET.nii.gz -interp nearestneighbour -dof 6 -omat diff2struct_fsl.mat -out mean_b0_preprocessed_BET_regFSL.nii.gz -finesearch 5

#Convert FSL transform to MRTRIX transform
transformconvert diff2struct_fsl.mat mean_b0_preprocessed_BET.nii.gz 5ttgen-tmp-*/T1_BET.nii.gz flirt_import diff2struct_mrtrix.txt

#Apply (inverse) transform to the 5ttgen data
mrtransform 5tt_nocoreg.mif -linear diff2struct_mrtrix.txt -inverse 5tt_coreg.mif
For some reason I had to include the flip argument to get the same orientation as the other images.
I would have thought that transformconvert flirt_import would not need any additional manual manipulation like this. But there’s a whole history of dealing with axis definitions for FSL / NIfTI compatibility. Did you happen to perform an explicit -strides +1,+2,+3 or -strides -1,+2,+3 when producing the NIfTIs for FSL? If you find that including these fixes the issue, but omitting them leaves the remaining erroneous axis flip, we might be missing a step in the flirt_import processing.
Just a small tweak to what I wrote above: I get better bzero to T1w registration (as one would expect) using the boundary-based registration available in FLIRT. FSL offers the epi_reg script for this, and it performs well even without having to BET the bzero image.
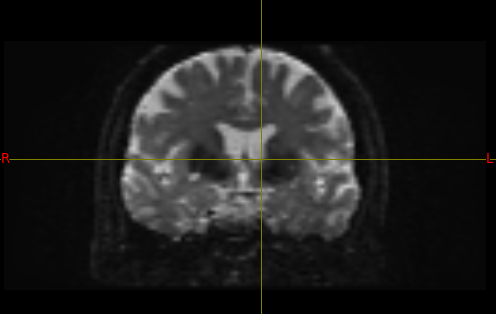
I’m facing some problems similar to those of @tkimura and @Daniel123 in the previous messages. I followed all the commands of step 4.1.1 in the tutorial (see below), but when I mrview the results 5tt_coreg.mif turned out to be flipped to a saggital axis.
I do not really understand previous mentioned directions (sorry, I’m far from experienced). Hope there is anyone who could help me to solve this problem.
The “5tt_nocoreg.nii.gz” image is not really appropriate to be using for registration. @martahedl: Is it possible to update the tutorial?
The simplest modification to make is:
Convert your unregistered T1-weighted image to NIfTI;
Use that image as the reference image for the flirt command;
When calling transformconvert, make sure you replace 5tt_nocoreg.nii.gz with the T1-weighted image you used as the reference image in your flirt call;
Leave the mrtransform call as it is: Even though you used the T1-weighted image as the reference image for registration, you still need to transform the 5TT image so that it spatially overlaps with the DWI data.
Hi!
It took me a while, but I finally managed to update the tutorial with respect to this issue. Also, I made a few more changes to make it compatible with the new release (e.g. changing dwipreproc to dwifslpreproc).
Cheers,
Marlene
Hi everyone
The tutorial has been a tremendous help.
I have also reviewed the tutorials for MRtrix on Professor Andrew Jahn’s website (Introduction to MRtrix — Andy's Brain Book 1.0 documentation).
From what I see in this forum and in the tutorial, co-registration should be done using T1 weighted images. However, in the tutorials on the other page, also under the consideration that flirt can only work with 3D images, fslroi (an option I didn’t see in the previous answers) is used to extract the first segmentation volume from the dataset, which corresponds to the gray matter segmentation.
Is this the same as the step proposed with fslsplit 5tt_nocoreg.nii.gz myprefix -t ?
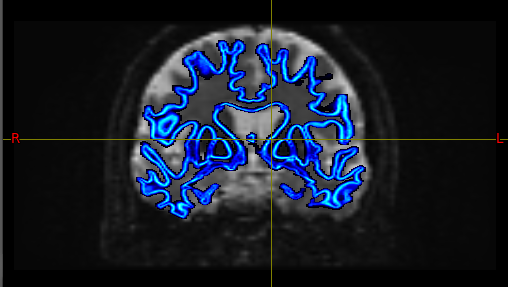
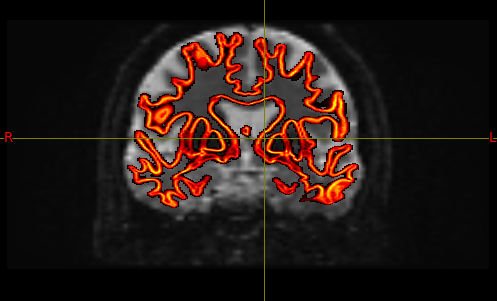
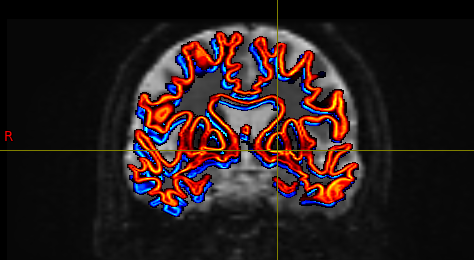
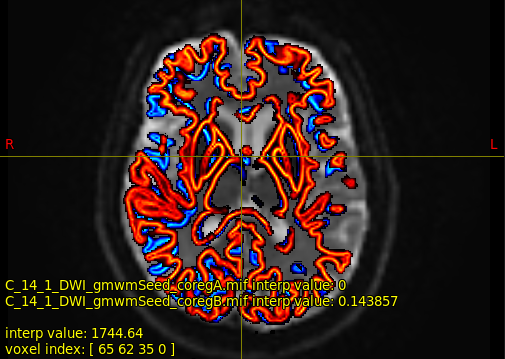
I’ve made both options to use the respective 5tt_coreg. mif in the preparation of the mask of streamline seeding with 5tt2gmwmi. The 1st image dwi_preproc_unbiased, the one with cold tones is the mask obtained with T1 and in warm tones the one obtained from the gray matter segmentation.
I’d just like to know if it is still better to perform the flirt function from T1?
I was wondering how to generate the annotation files (lh.hcpmmp1.annot & rh.hcpmmp1.annot) for each subject. In the BATMAN tutorial, it says that this can be done via the Connectome Workbench, but I couldn’t find any instructions for this. If anyone has any advice on this, it would be much appreciated, thank you so much.
Hey Lenore - the note on using Workbench is if you wanted to go through the steps to project the atlas onto fsaverage. The figshare HCPMMP1 link and the Supplementary Files folder already provide the fsaverage-projected annot files. You can follow bash commands in the grey box on pgs. 35-36 to then map the fsaverage annot files onto your participant’s data.